Active Directory Application
Note
This application is only relevant to those accessing via the Atmos Agent.
Using the Atmos Agent, administrators can allow users to authenticate with Active Directory and access its services. To configure an Active Directory application, admins must specify the Active Directory’s Domain, DNS Servers, and the address of any additional services in the internal network (for example LDAP or Kerberos servers). After creating the application and adding it to the policy rules users can access the Active Directory services.
Adding an Active Directory Application
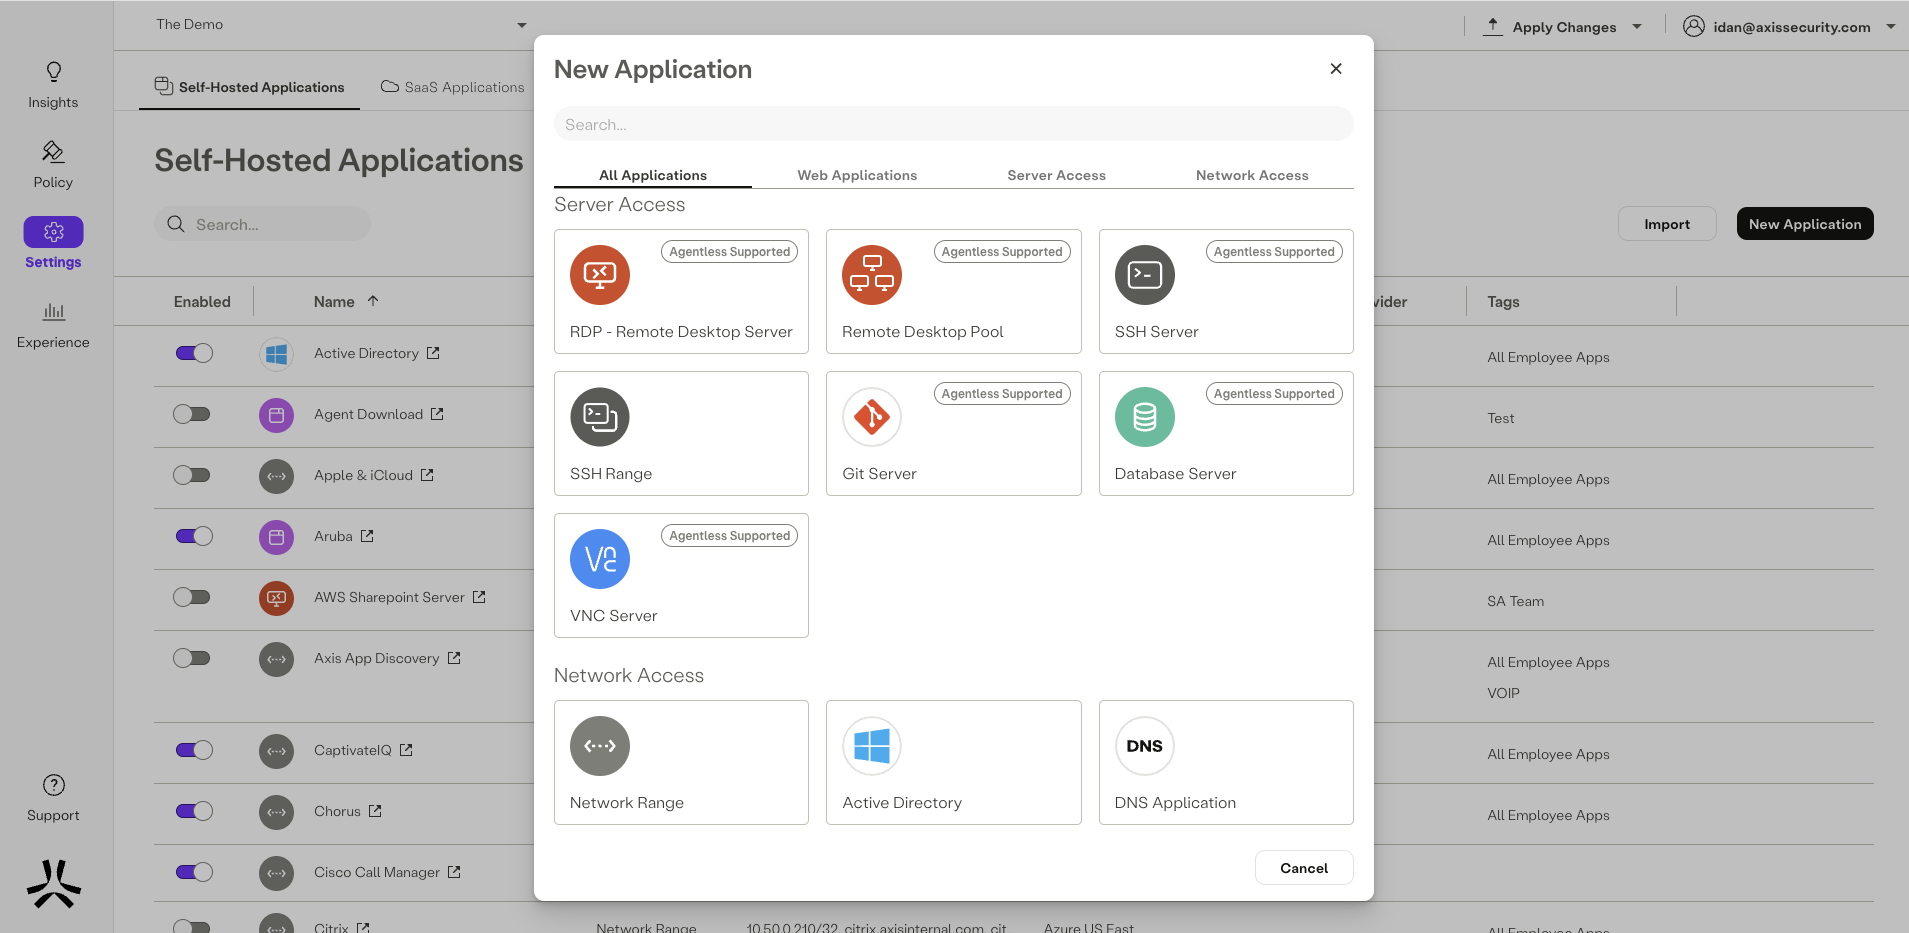
- In the Management Console, go to Settings -> Applications > New Application.
- In the Network Access area, select Active Directory.
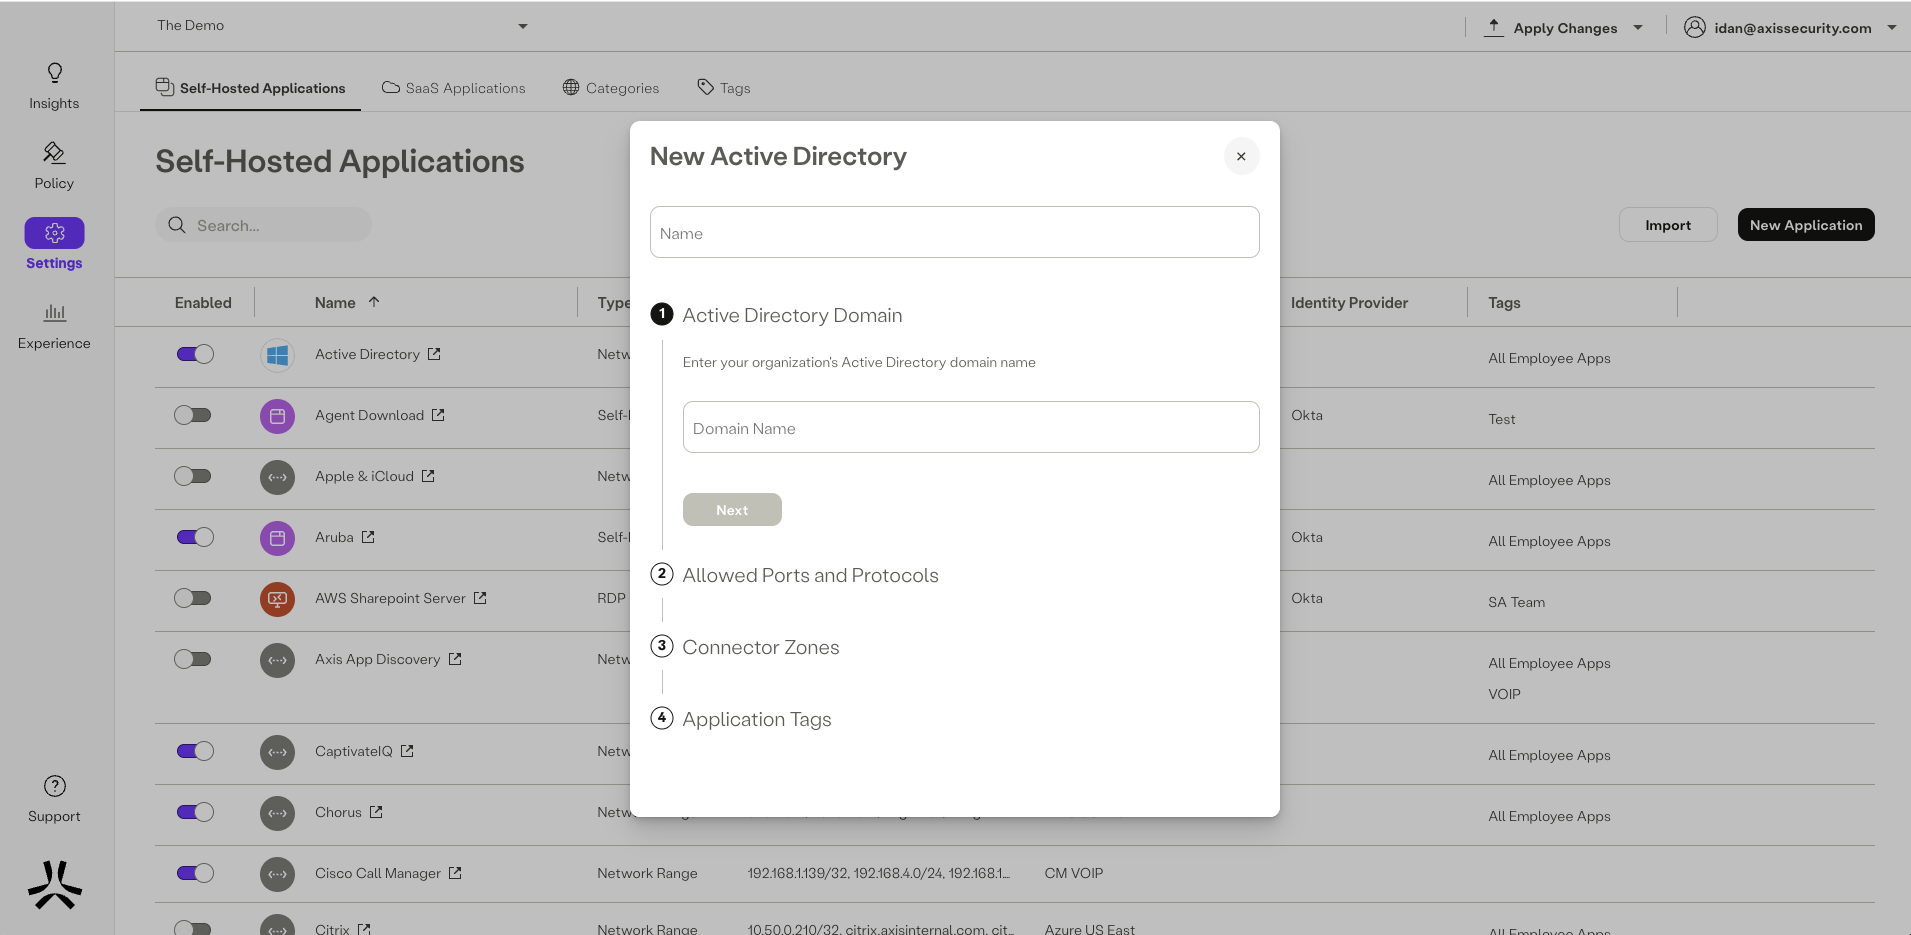
Step 1: Active Directory Domain
- Add a name for the application.
- Enter your organization’s Active Directory Domain.
- Click Next.
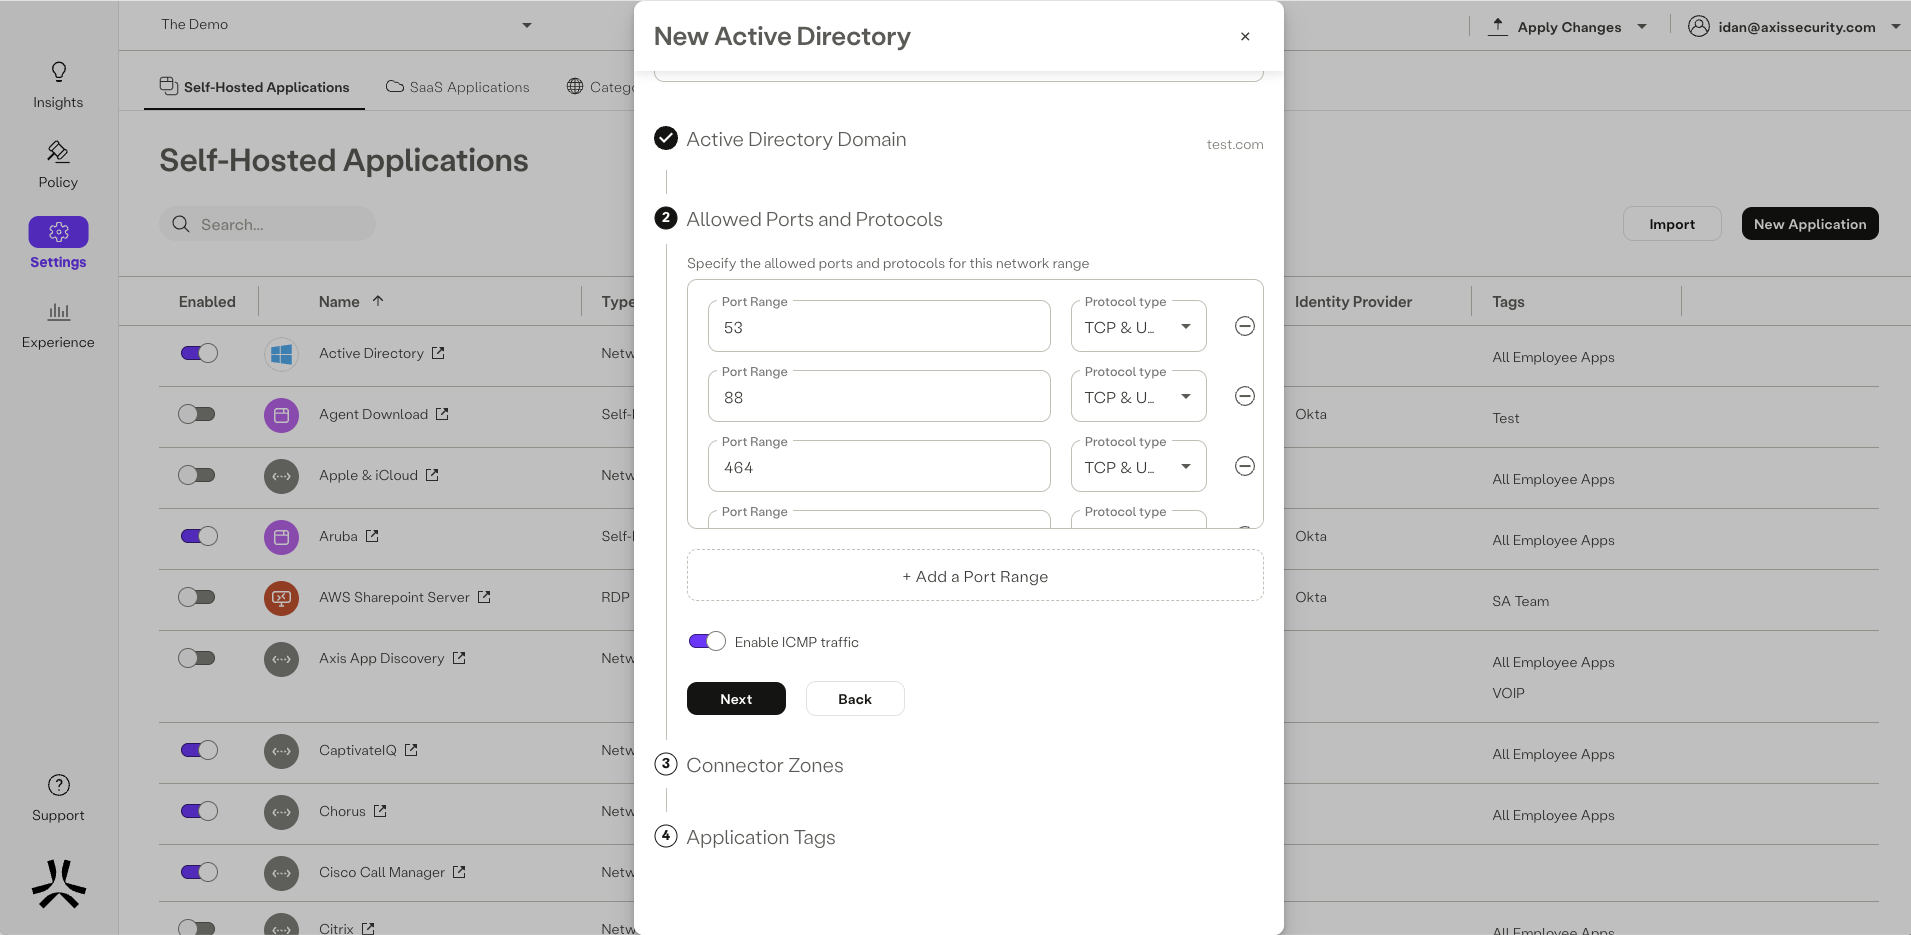
Step 2: Allowed Ports and Protocols
- Enter port ranges that are relevant for the ranges you entered previously.
- For each port range, click the drop-down menu to select the protocol type: UDP, TCP, or both.
- Select the Enable ICMP traffic option to check connectivity on a AD Application.
- For a list of supported ICMP commands and requirements, click here.
- Click Next.
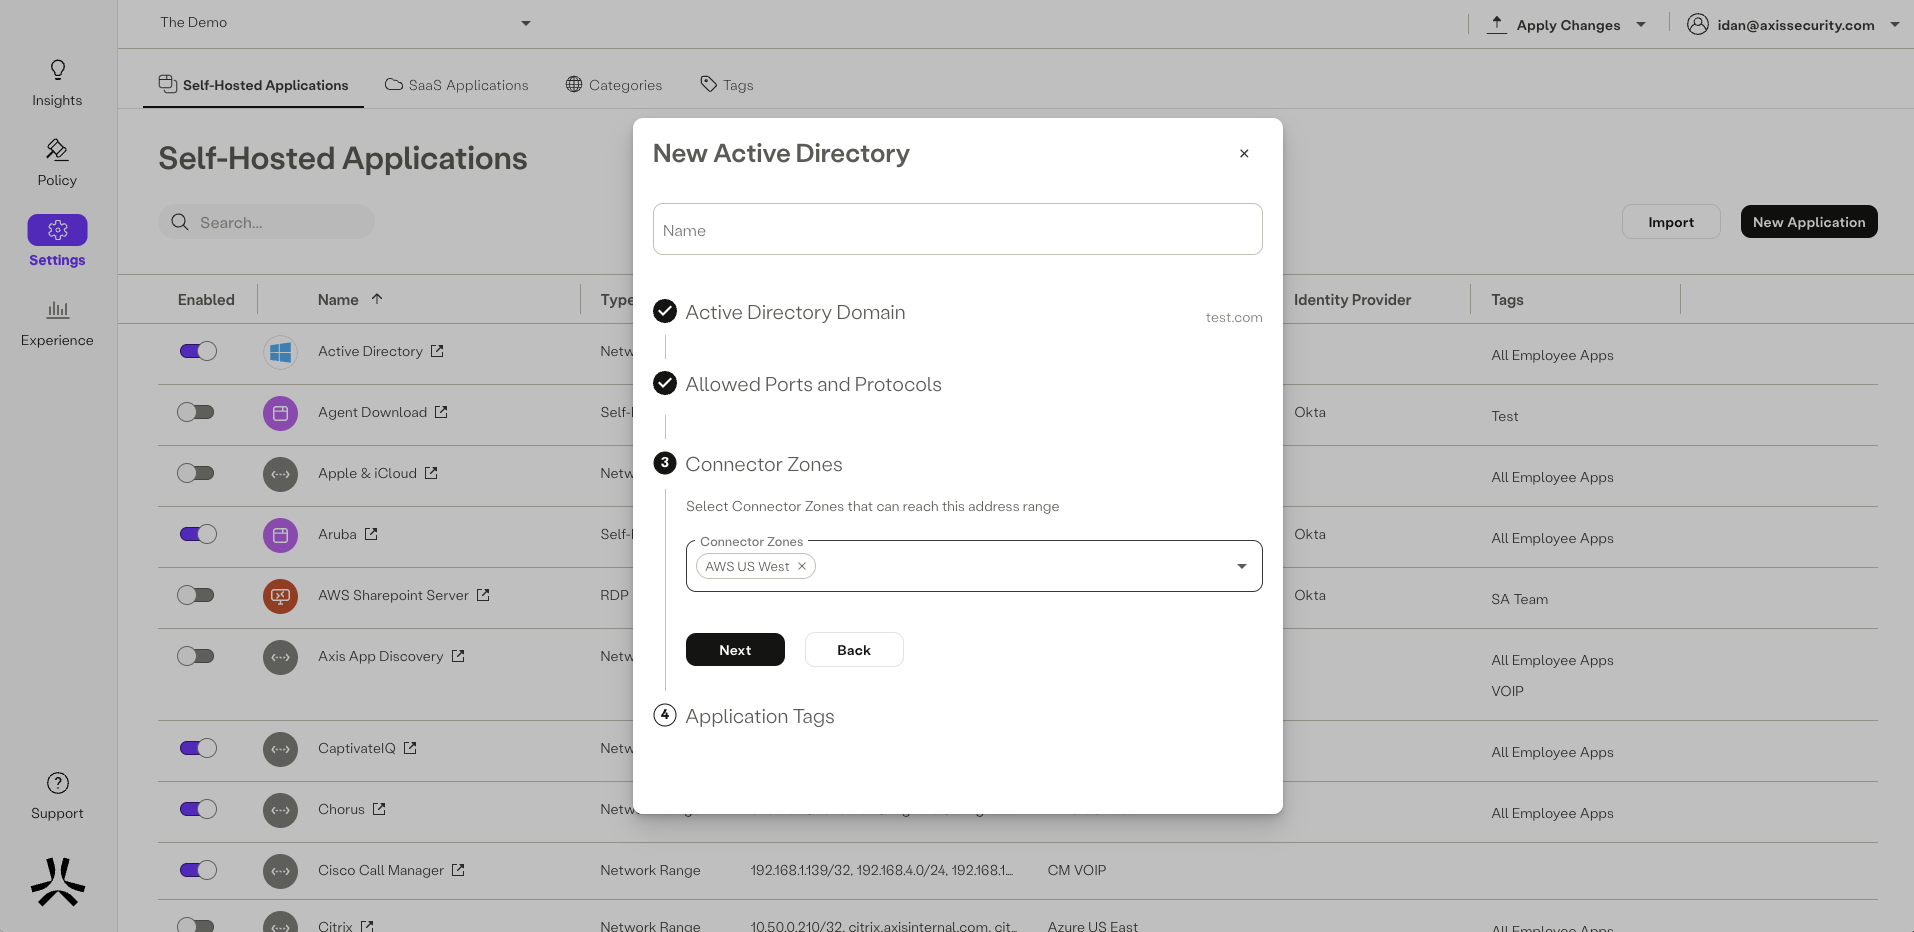
Step 3: Connector Zones
Each application has a defined Connector Zone through which the Atmos Agent can access the application.
- Click the Connector zone drop-down menu to select a Connector Zone that can reach the IP address range.
- Click Next.
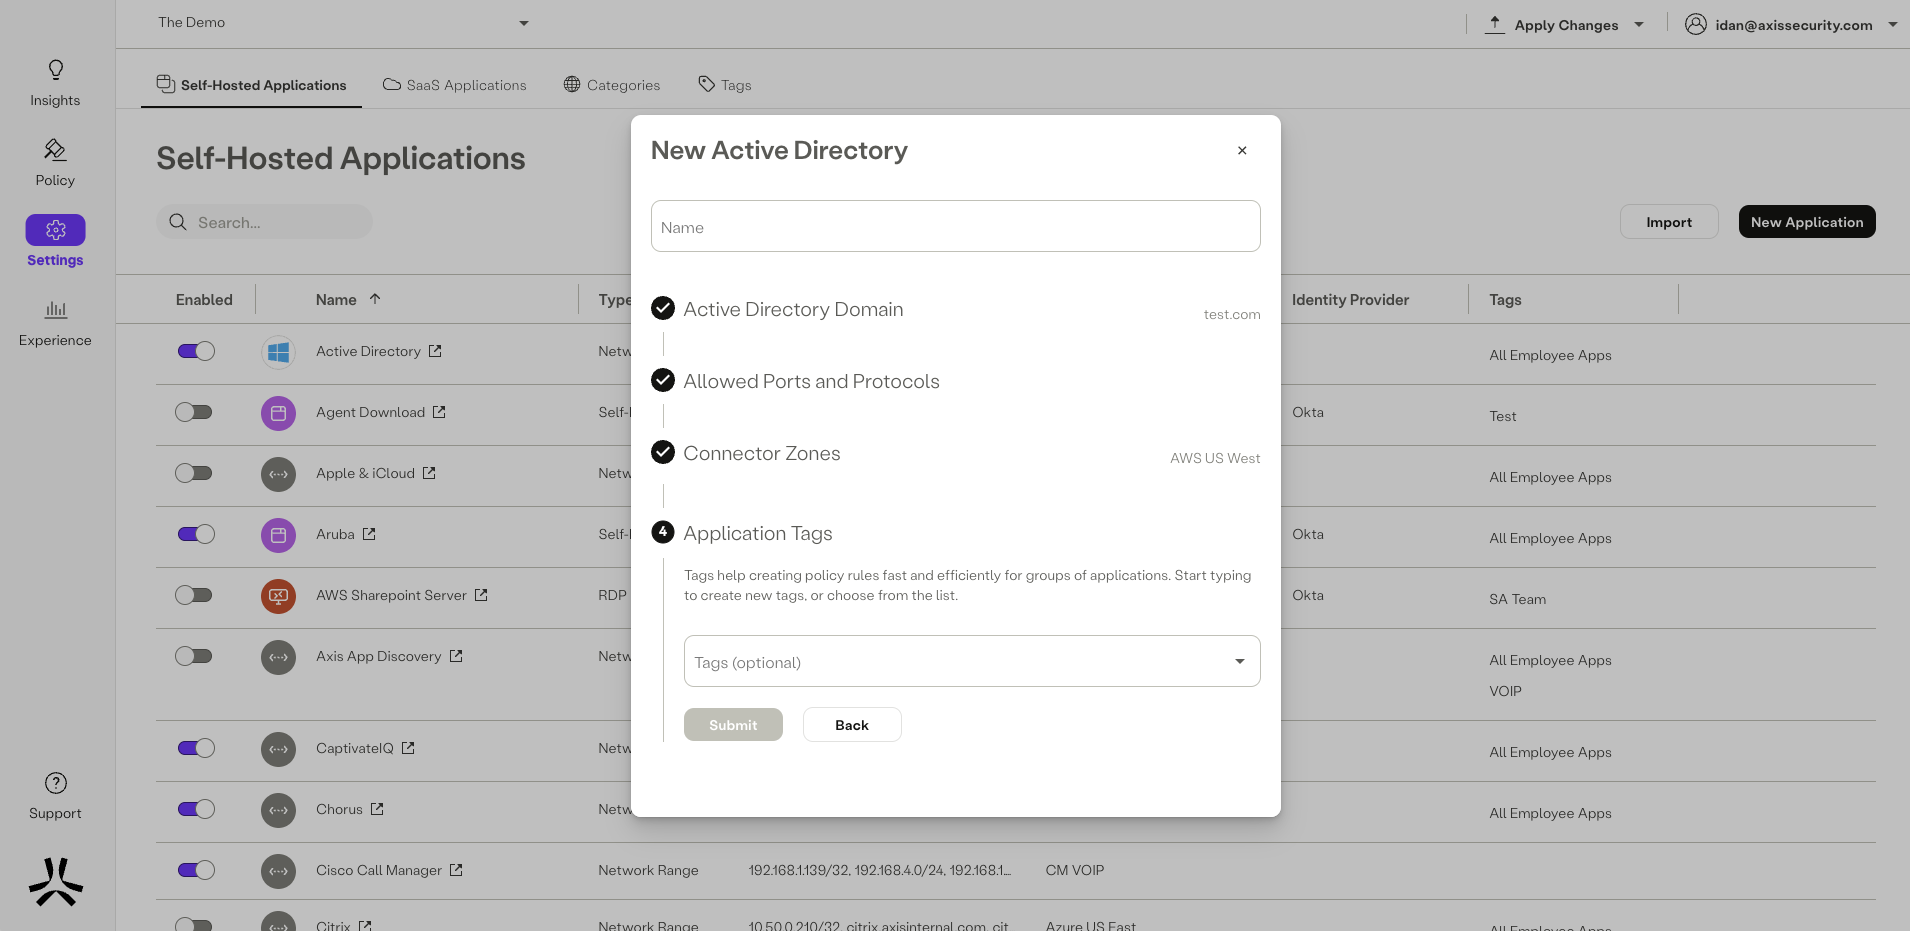
Step 6: Application Tags
Tags help creating policy rules fast and efficiently for groups of applications. Click Creating a New Application Tag ] to learn about creating application tags.
- Start typing to create new tags, or choose from the Tags drop-down menu.
- Click Submit.
Note
To commit your changes, navigate to the top-right menu, click Apply Changes, then select Commit Changes.
Updated 8 days ago
